Carbon Paddleboard Repair
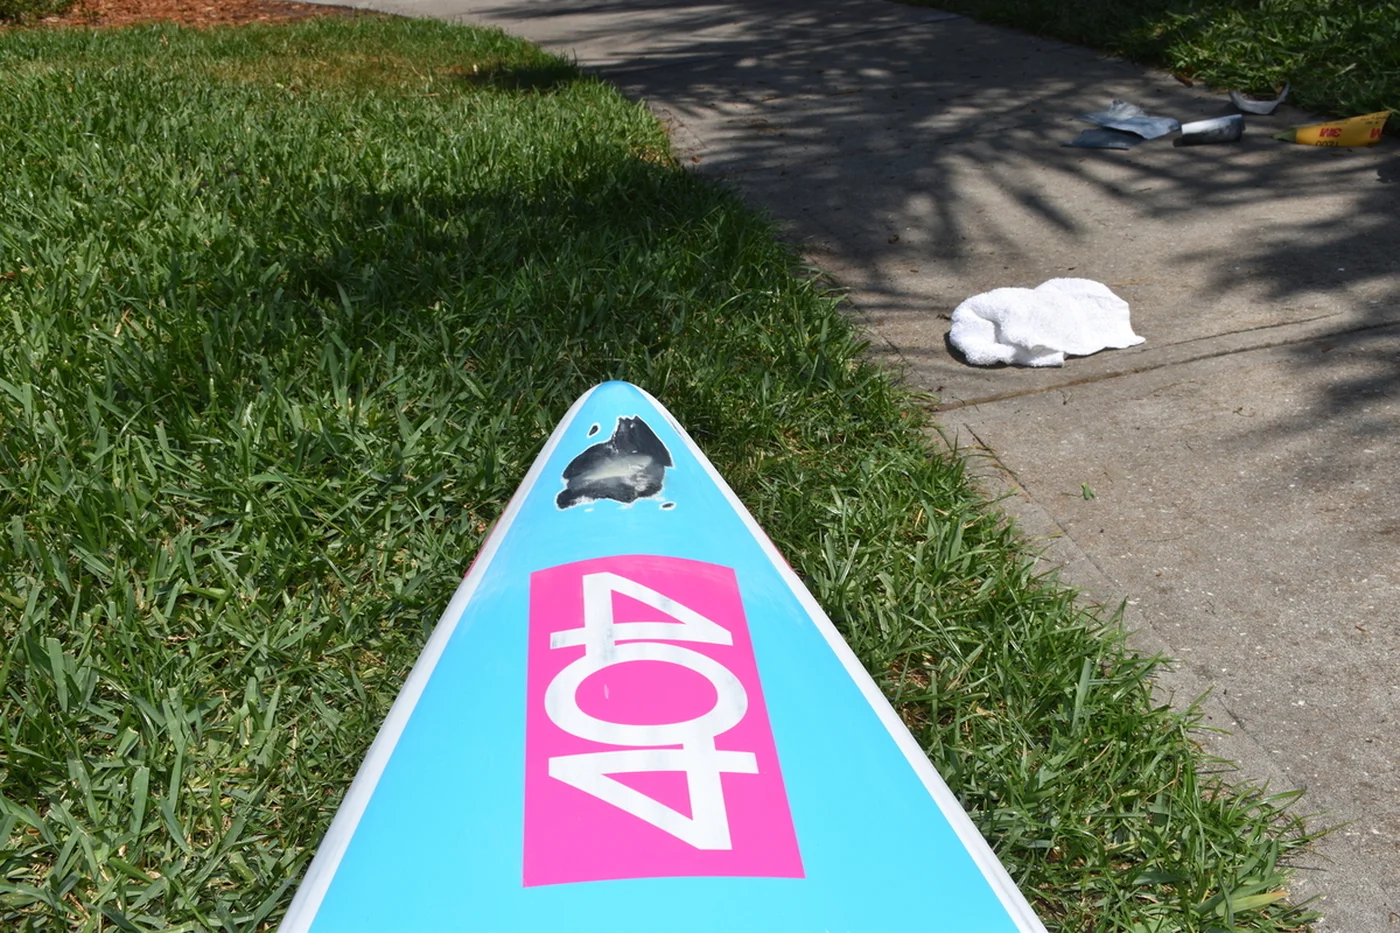
03.23.2026 • AnywhereMy first weekend outing with a new 404 Carbon Race V3 paddleboard ended in disaster when I discovered two relatively large cracks prior to heading out for the second day at Alexander Springs. At first I thought the board might be trashed beyond repair, but after calming down I realized the cracks could be fixed. Thankfully it hadn’t taken on water.
The repair consisted of four distinct phases. This article covers part one — the structural repair. Part two will cover paint and clear coat.
After researching repair kits, I chose the West Systems 101-6 Maxi Repair Kit. It had everything needed for both cracks with materials left over.
Items Used for the Repairs
| ITEM | QTY |
| Epoxy | 3 packs |
| Hardener | 3 packs |
| Adhesive Filler (High Density) | ~2 Tbsp |
| Fiberglass Cloth | 4" x 8" |
| Mixing Cups | 3 |
| Brushes | 2 |
| Mixing Sticks | 3 |
| Exacto Knife | 1 |
| Scissors | 1 |
| Rubber Gloves | 1 pair |
| 80 / 120 / 220 / 1200 Grit Sandpaper | Various sheets |
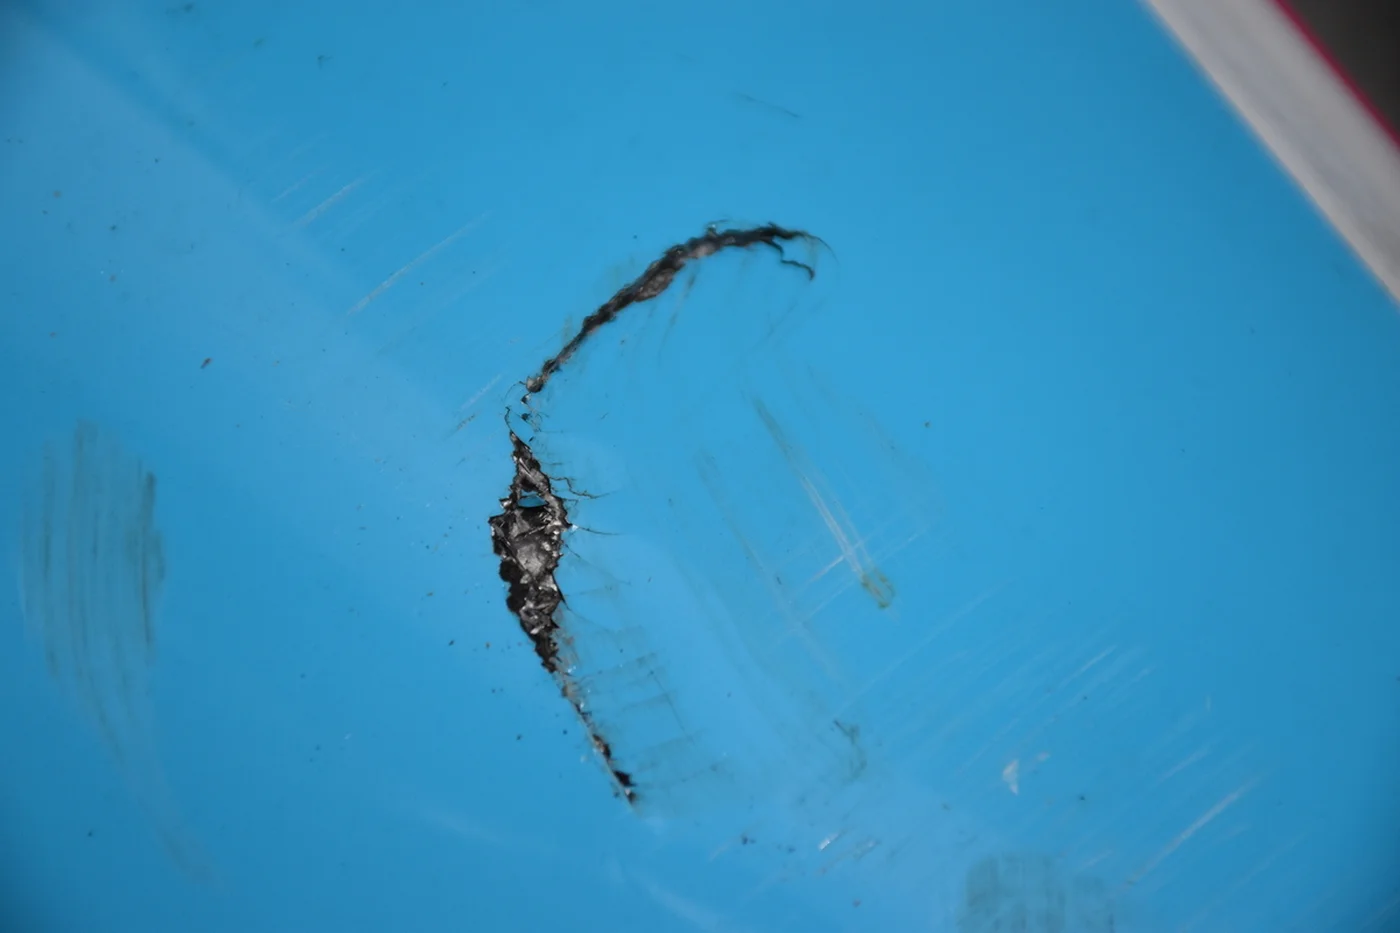
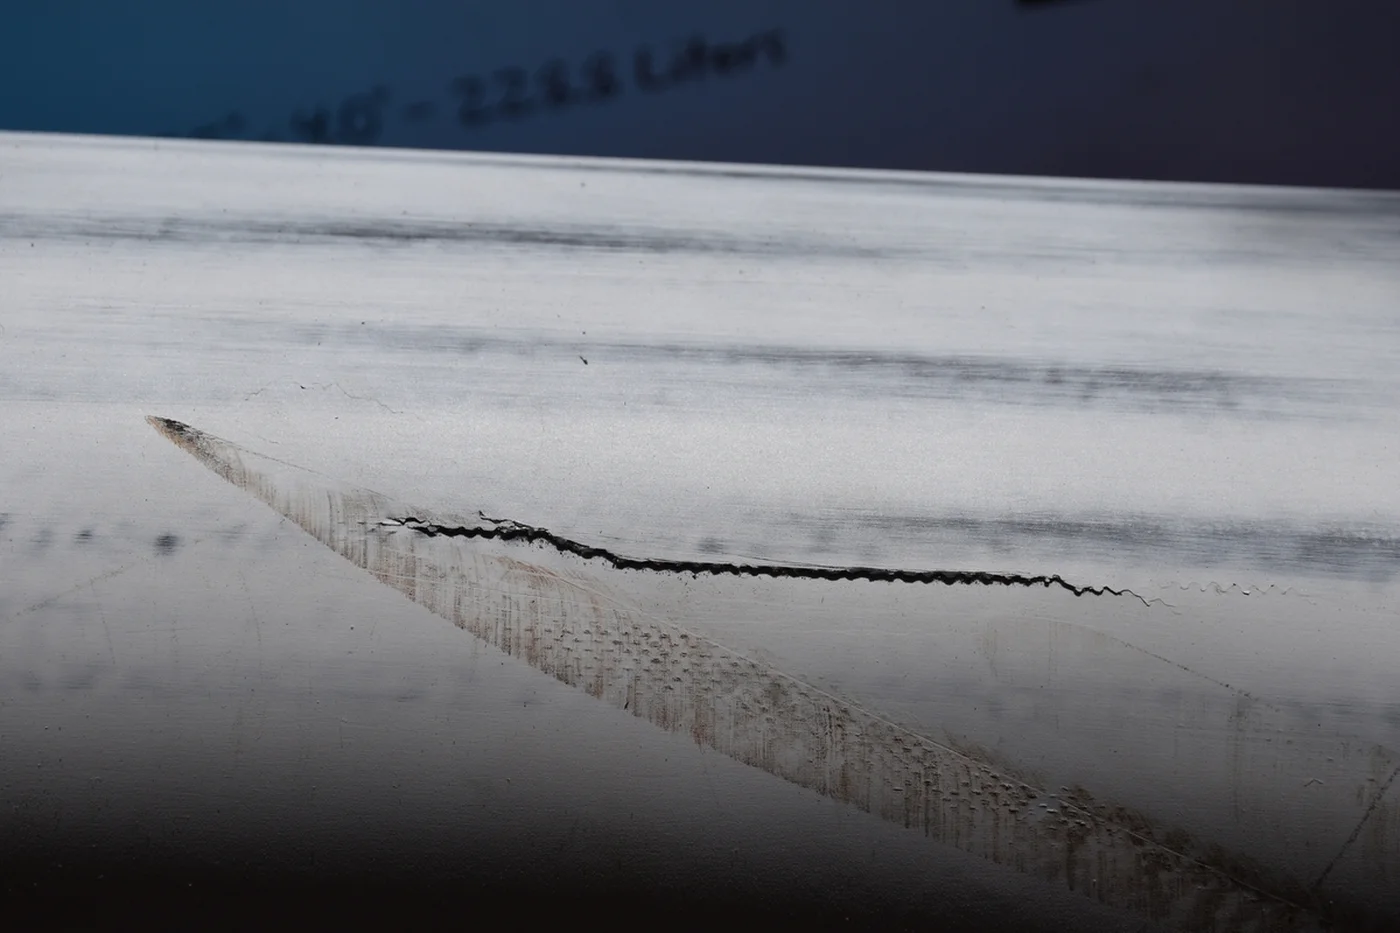
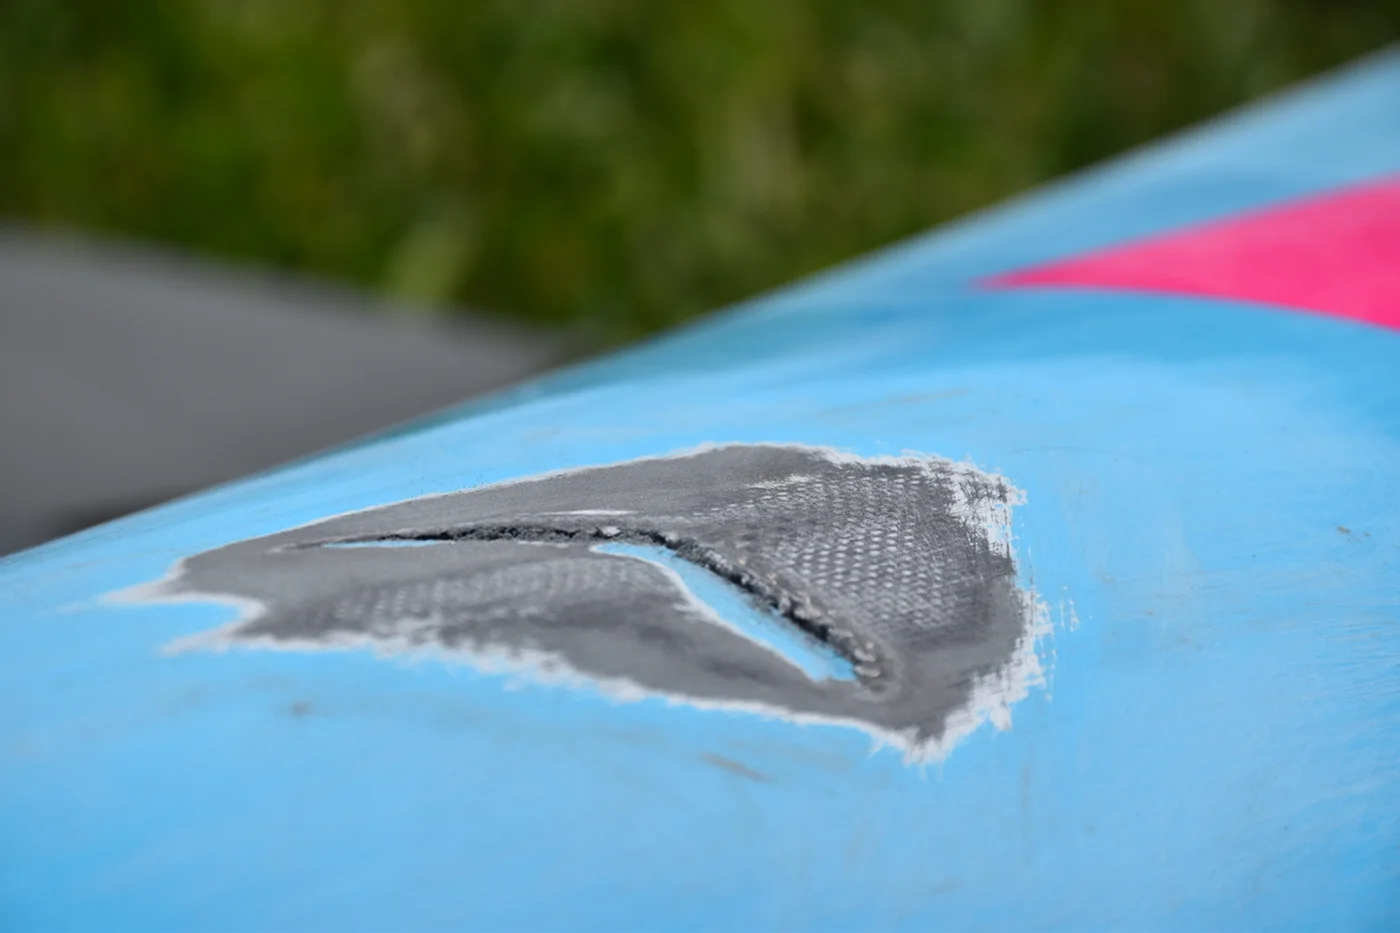
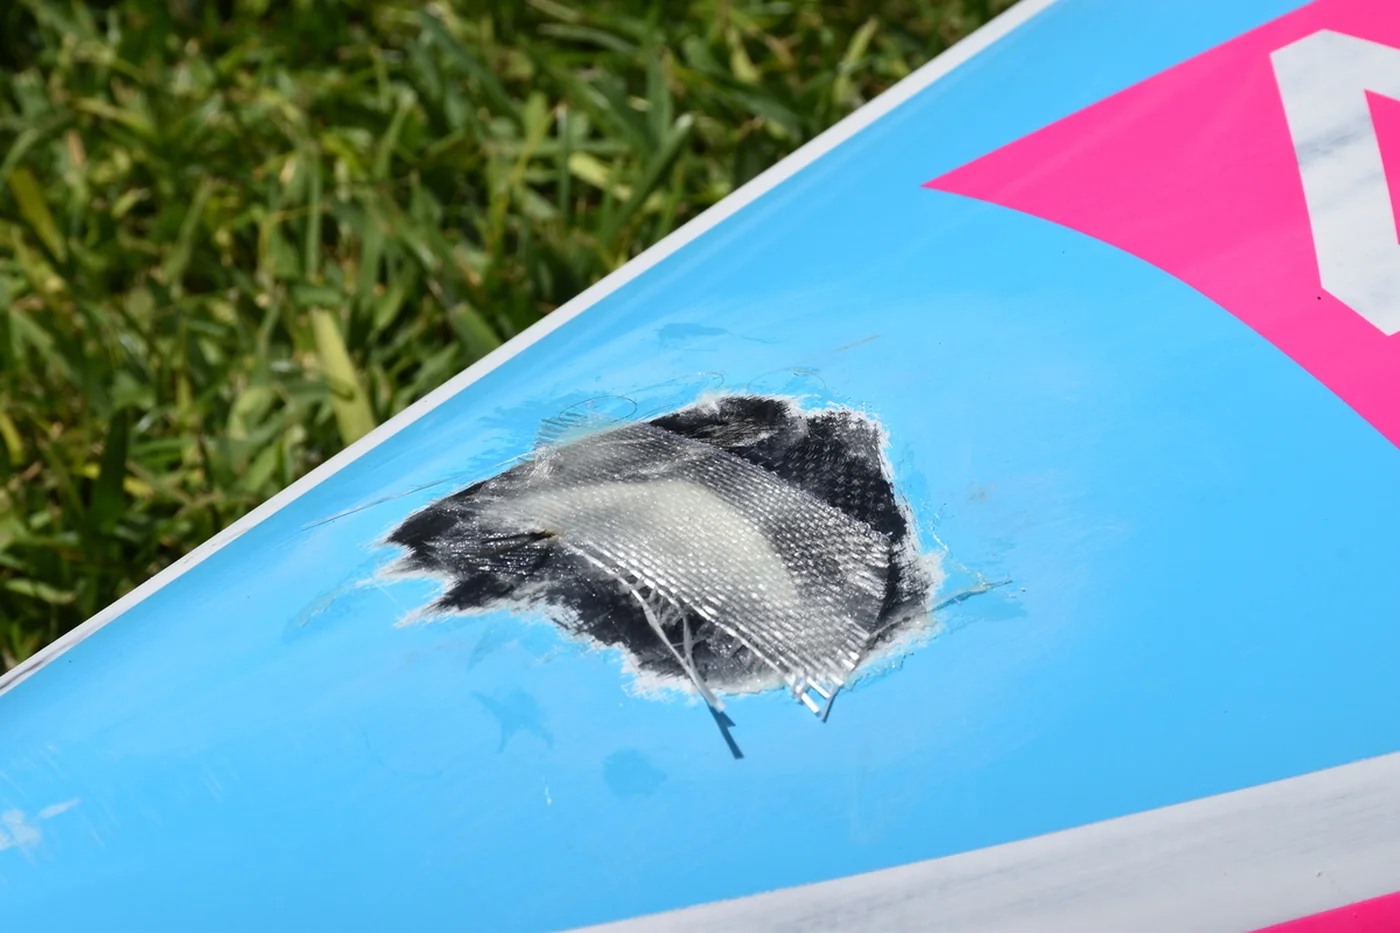
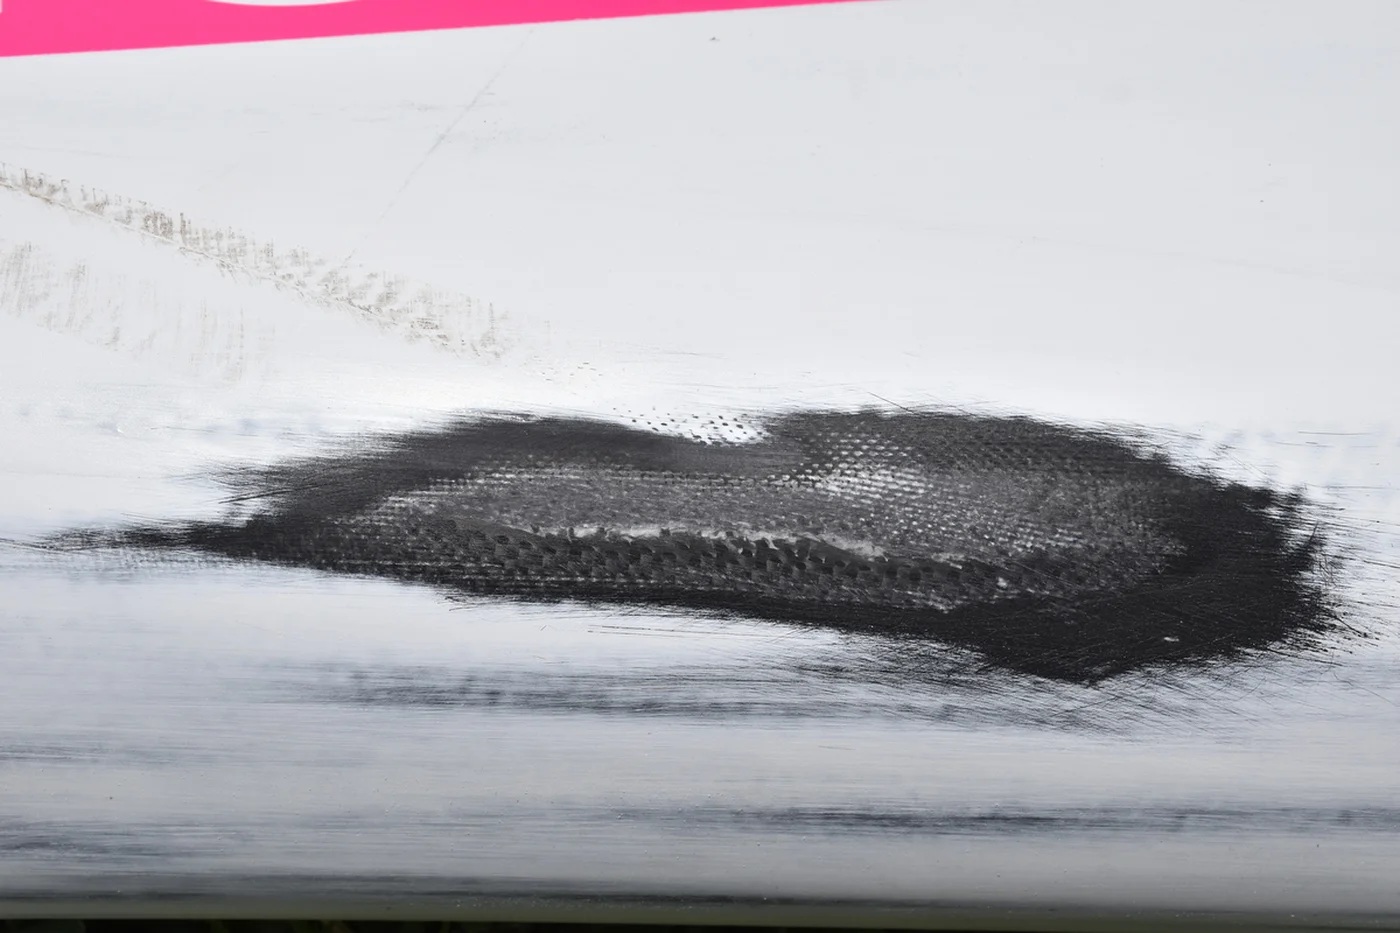
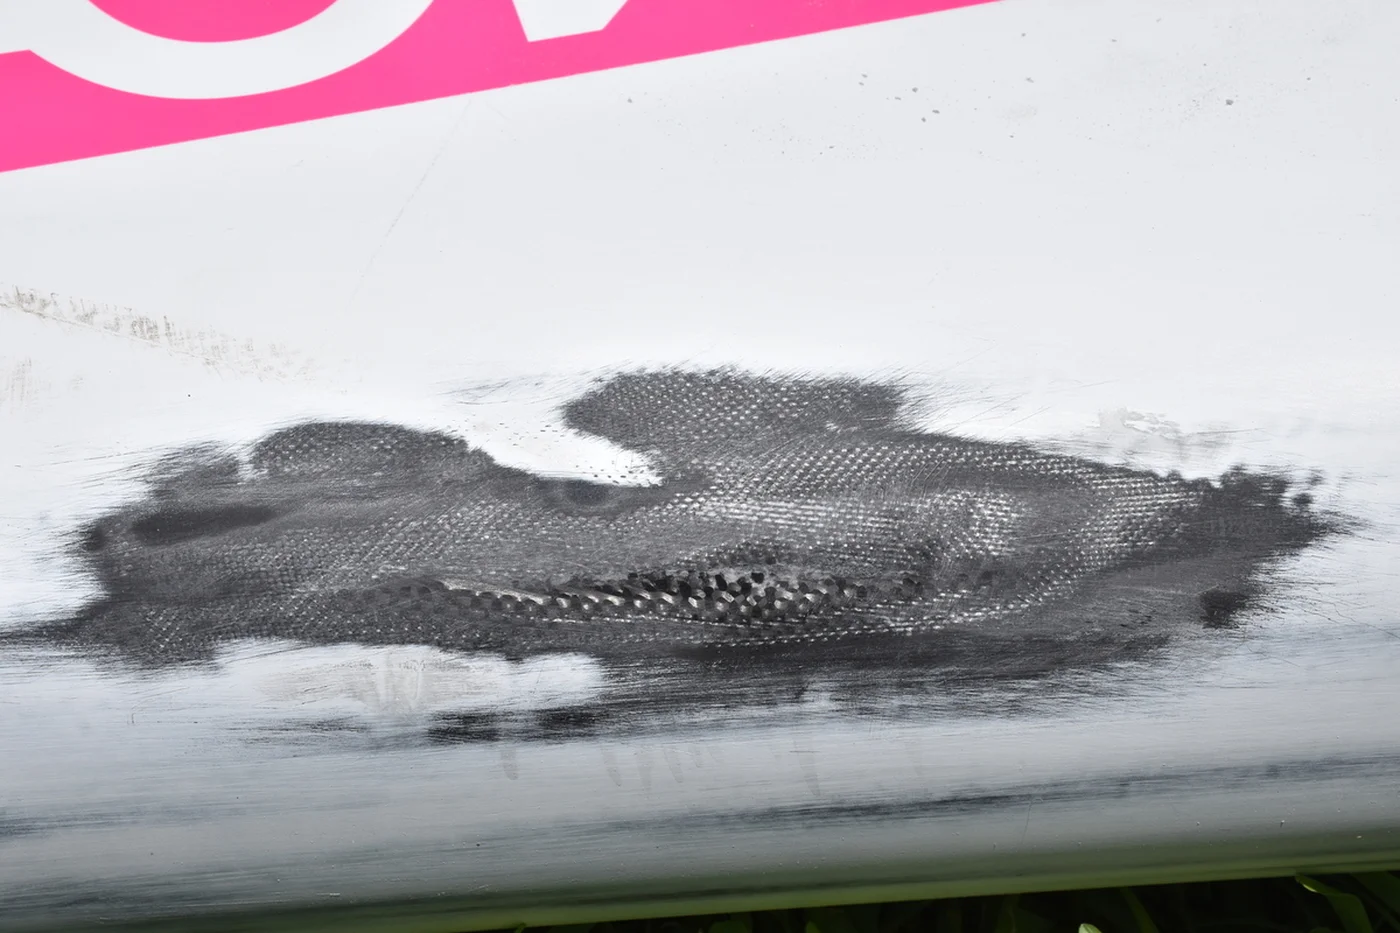
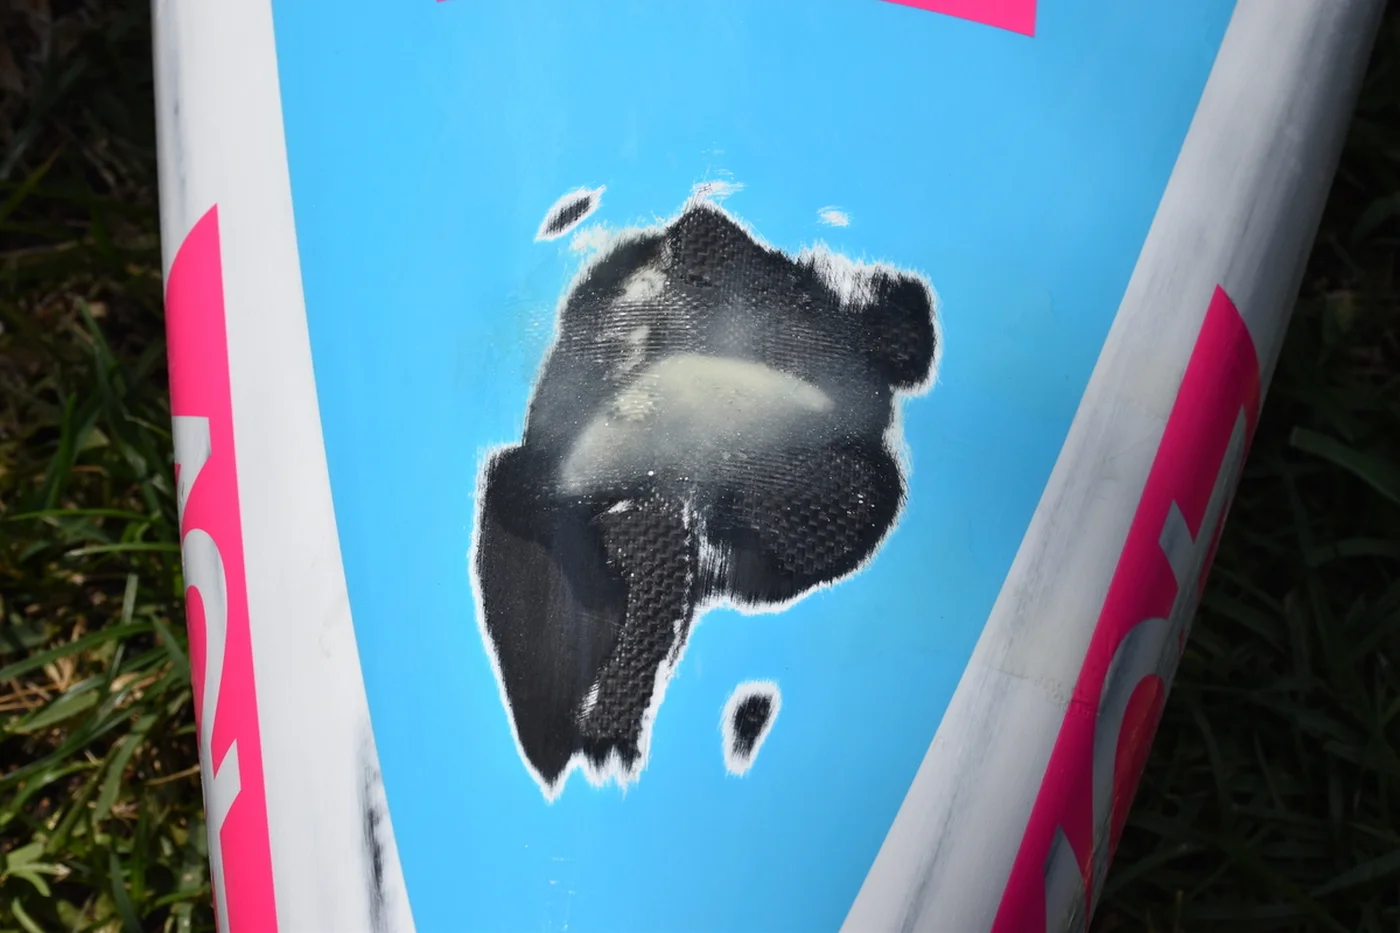
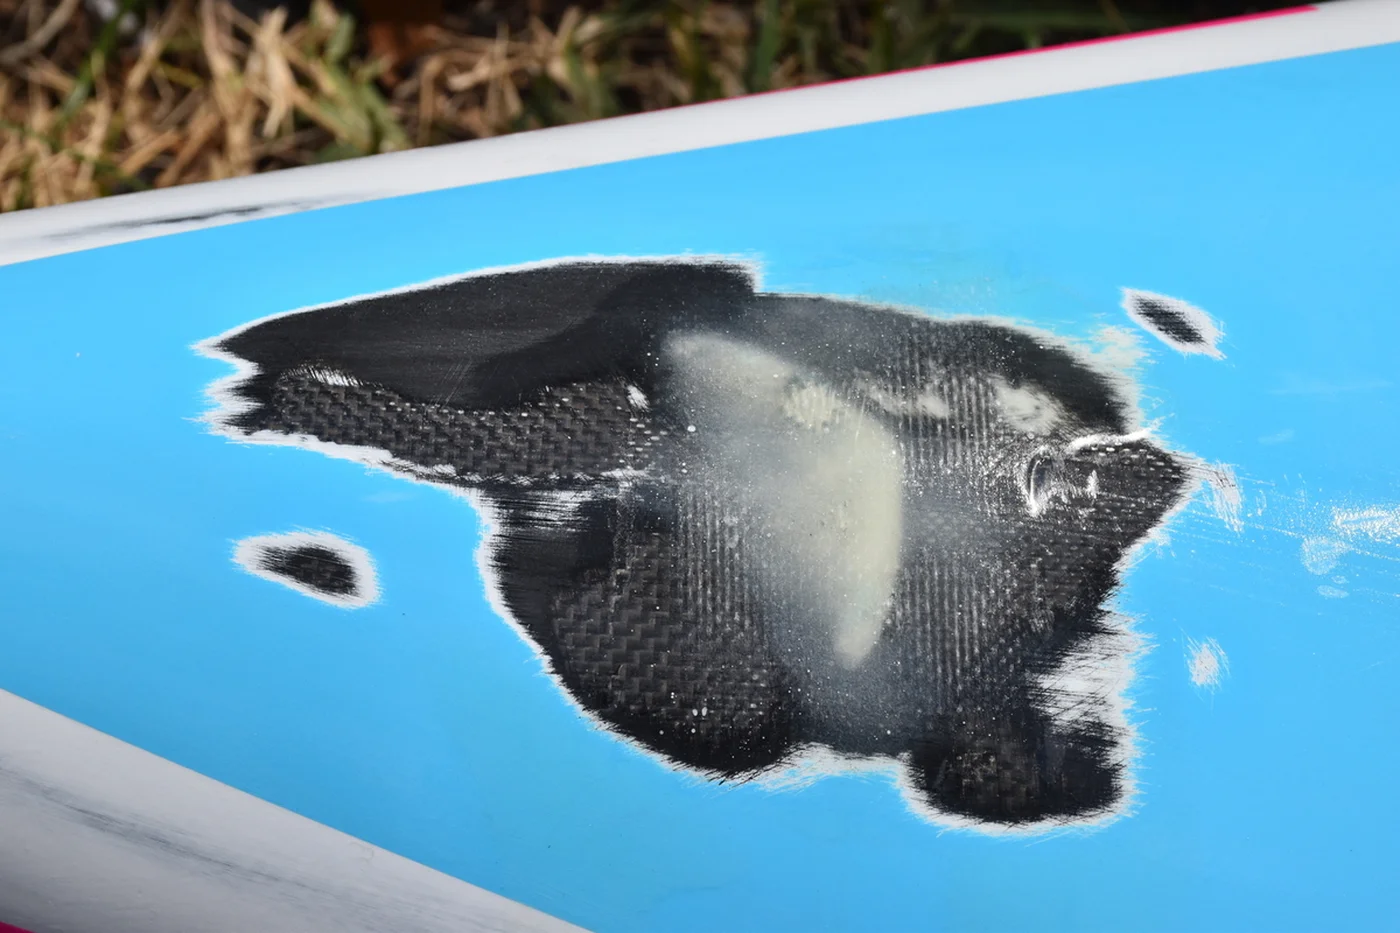
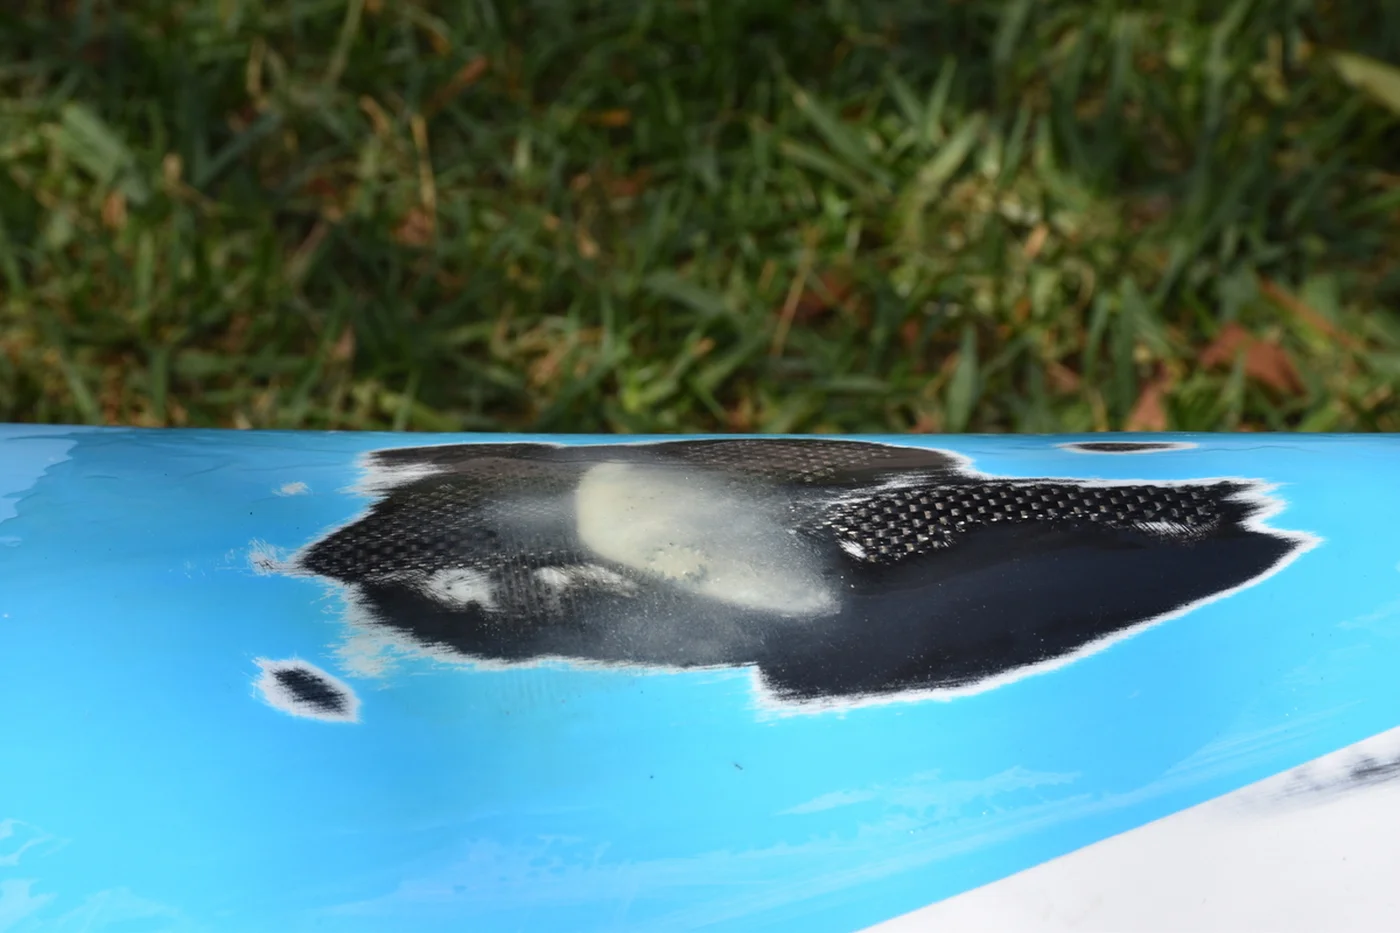
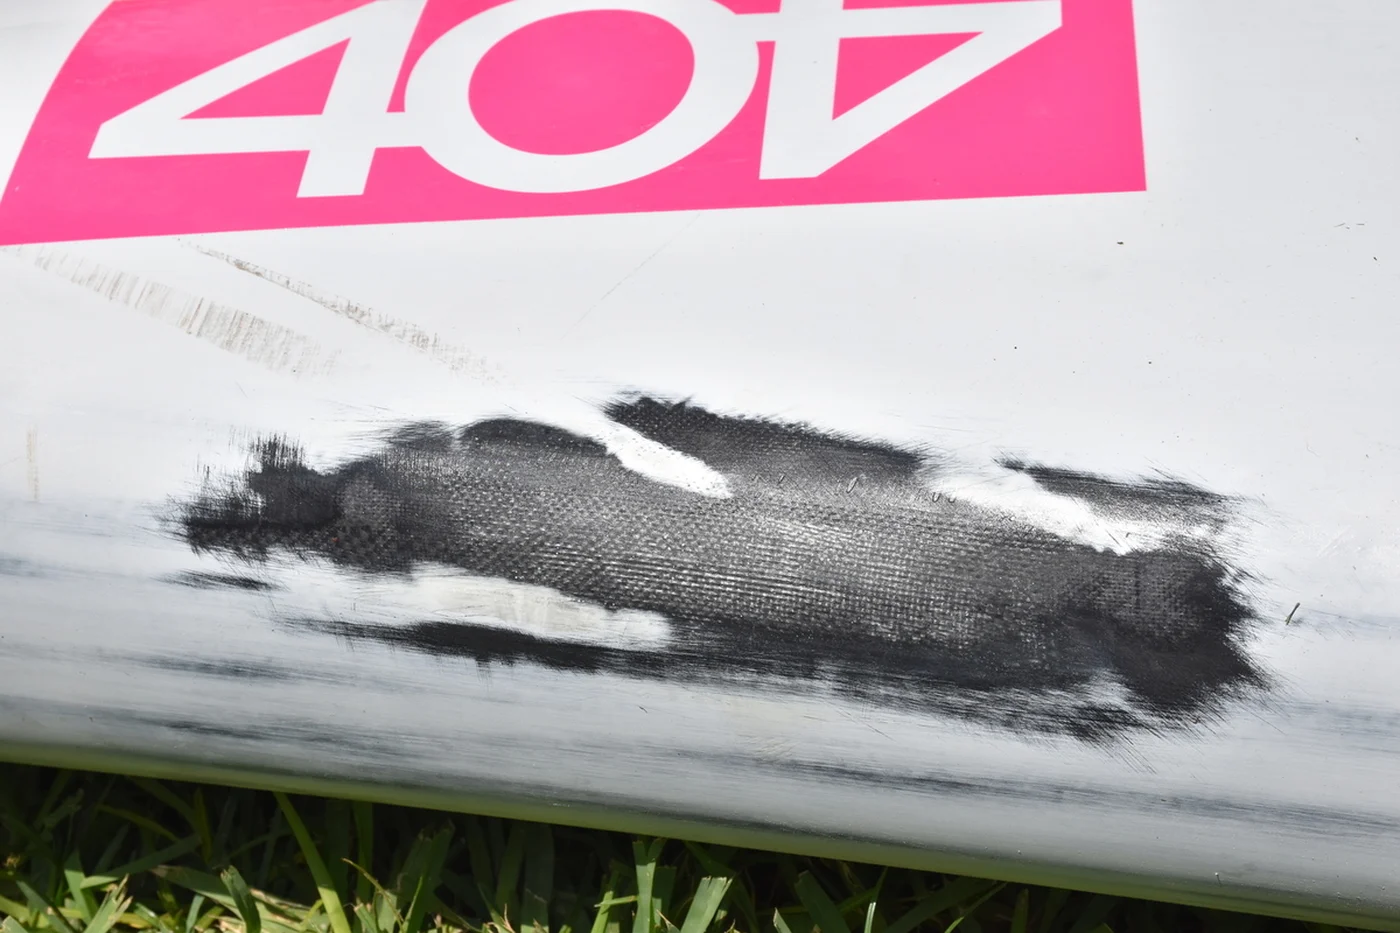
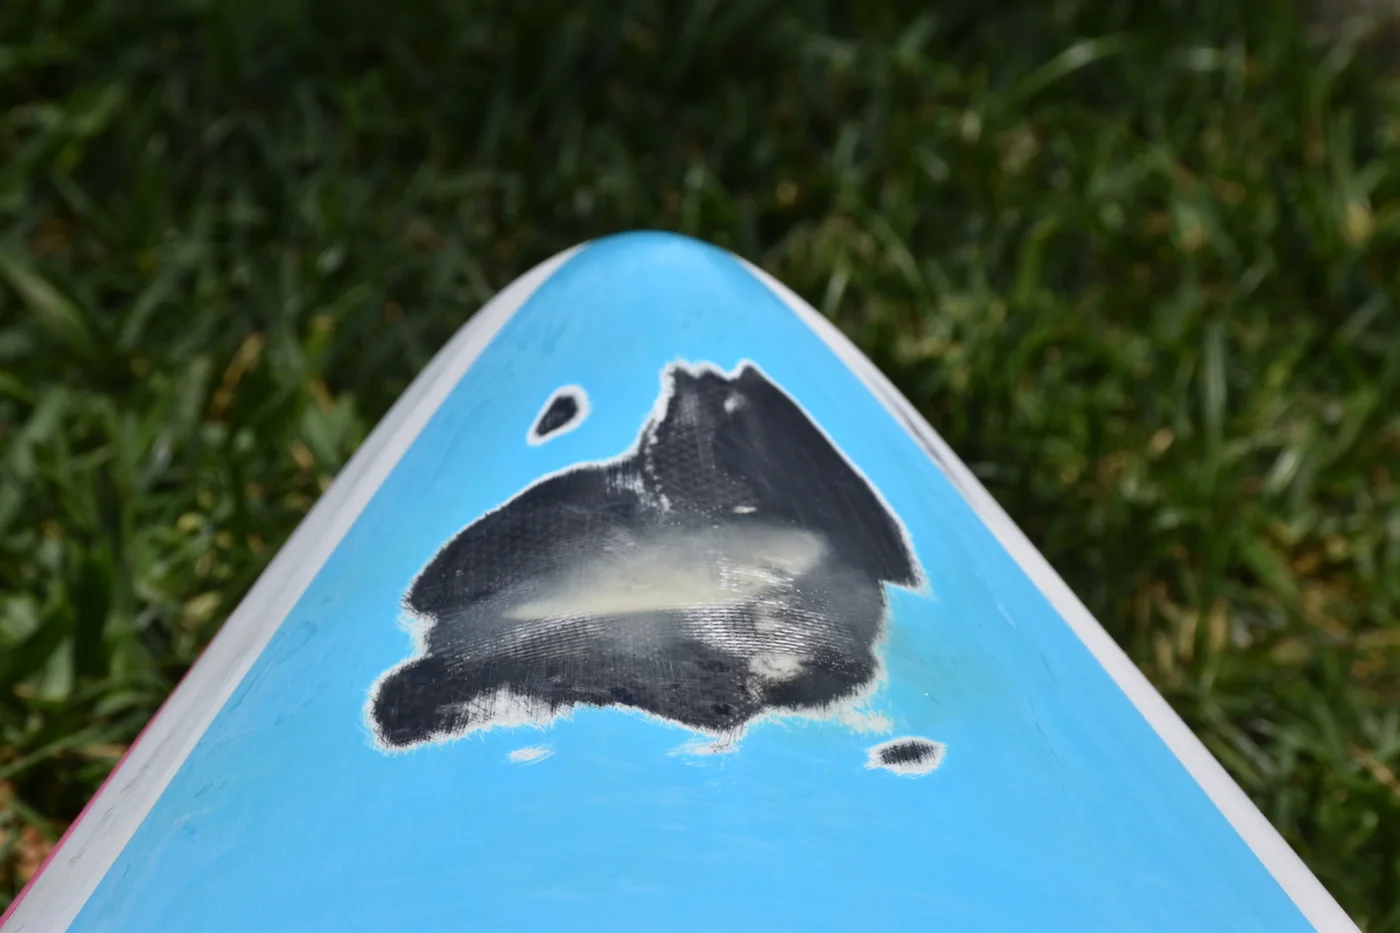
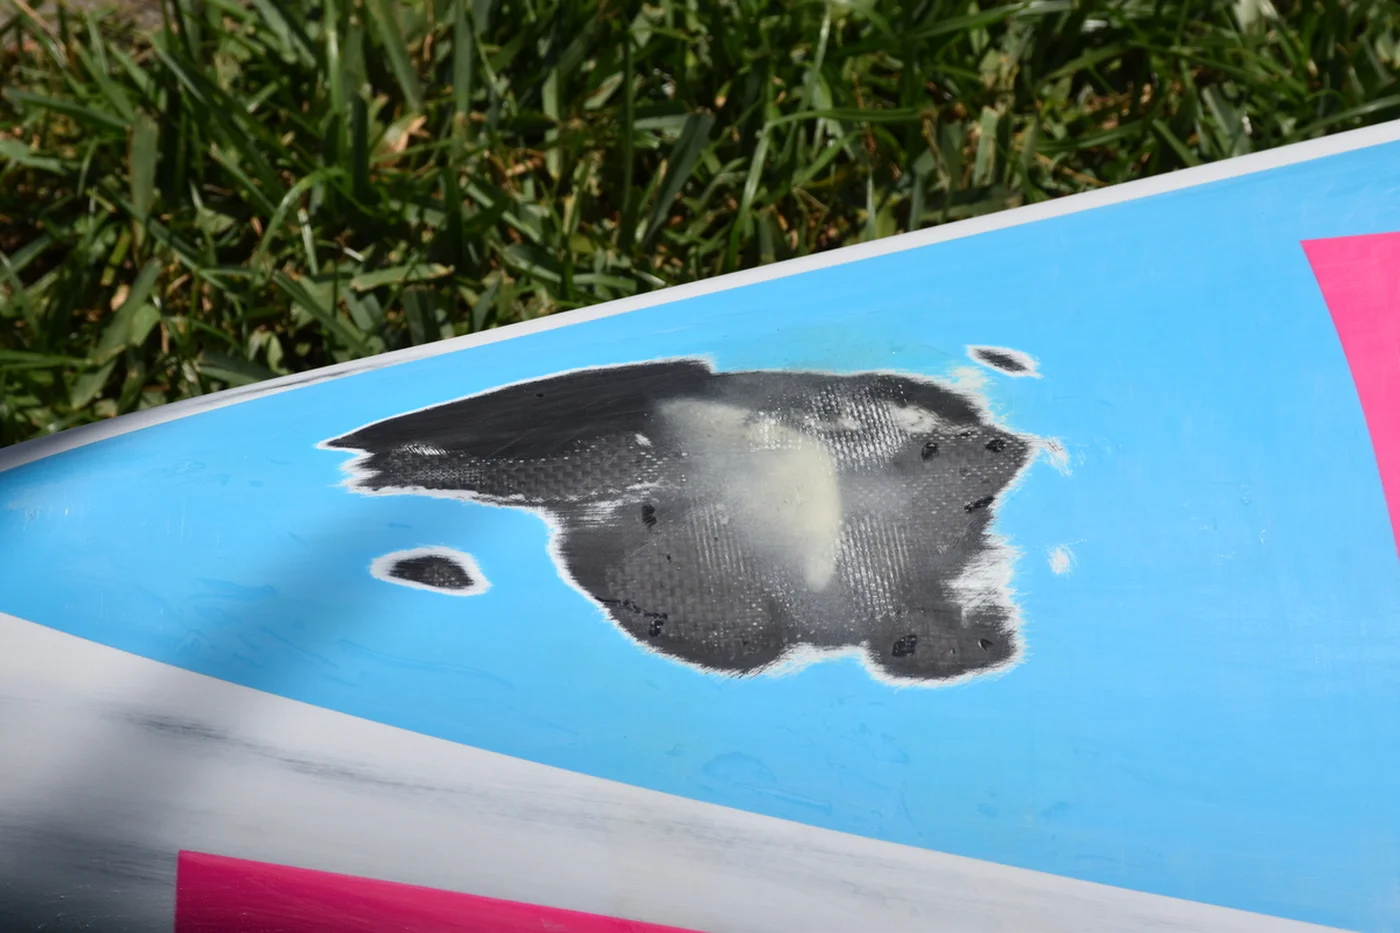
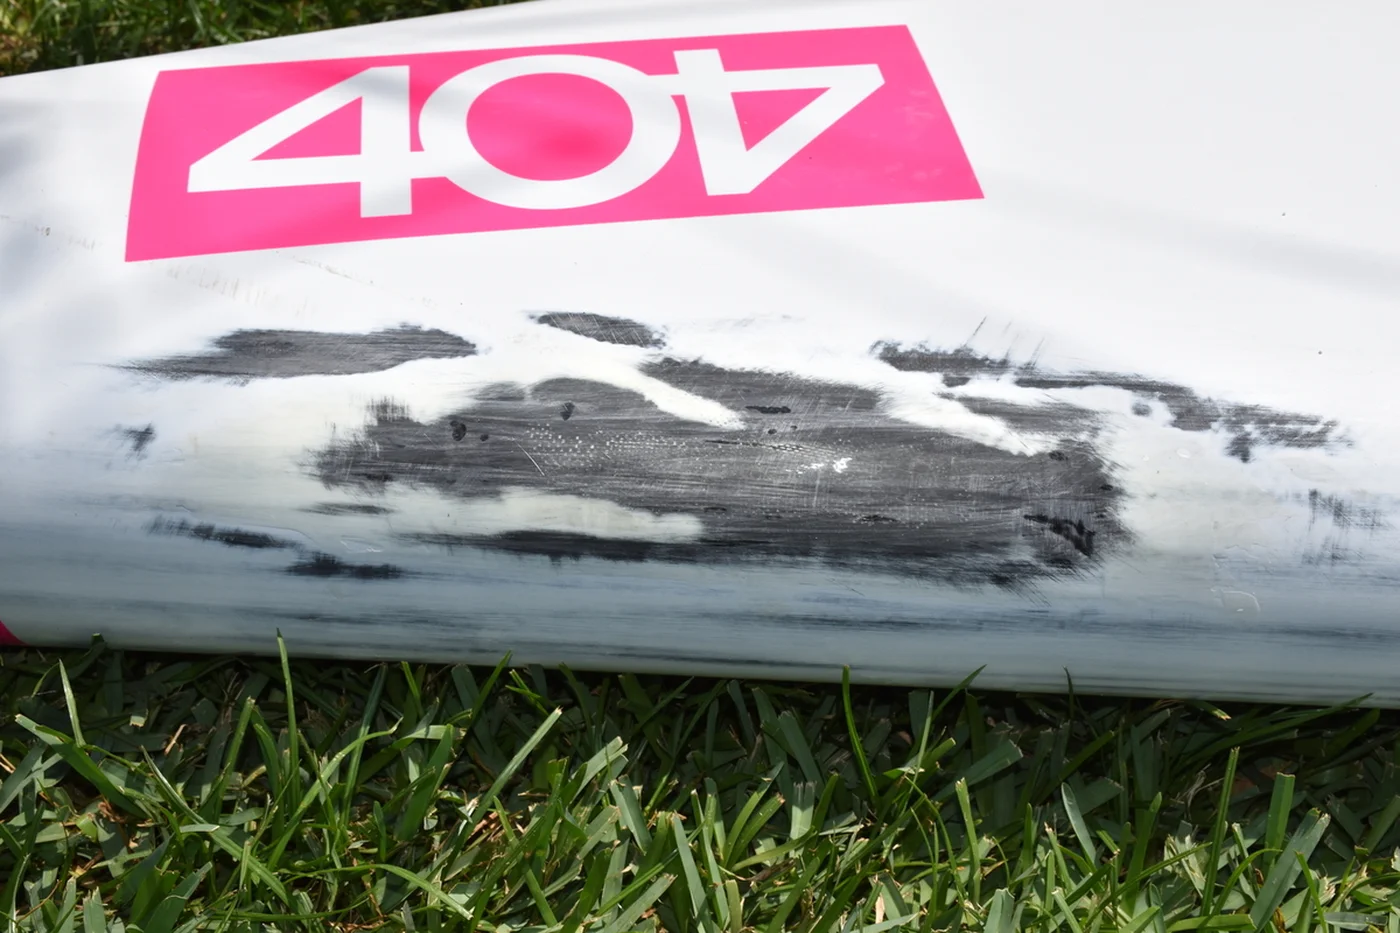
The Damage
The top crack was a 1.5" puncture that breached the carbon layer.
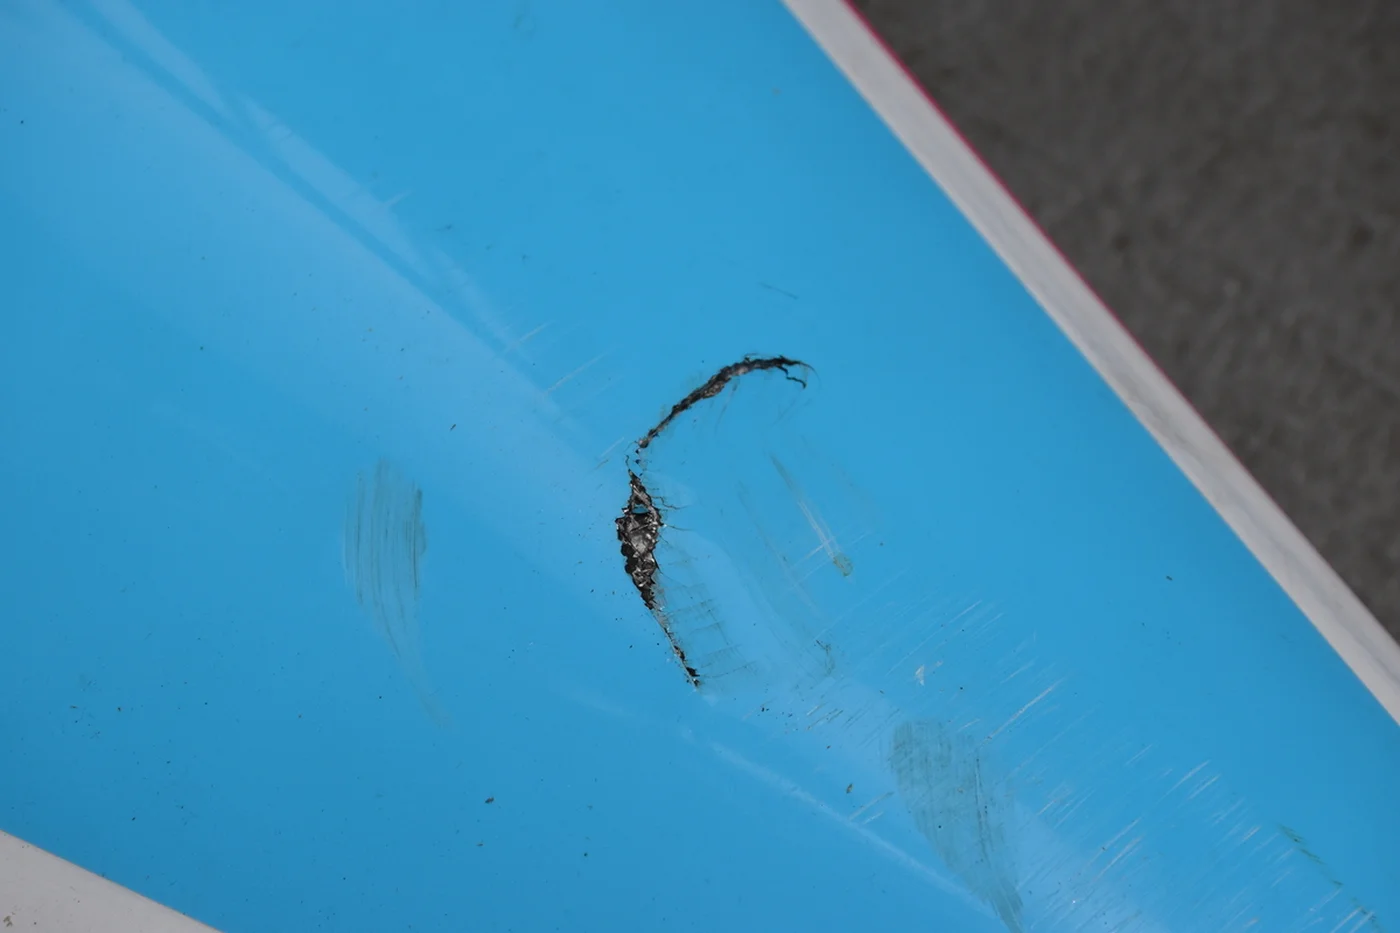
The side crack also breached the carbon layer.
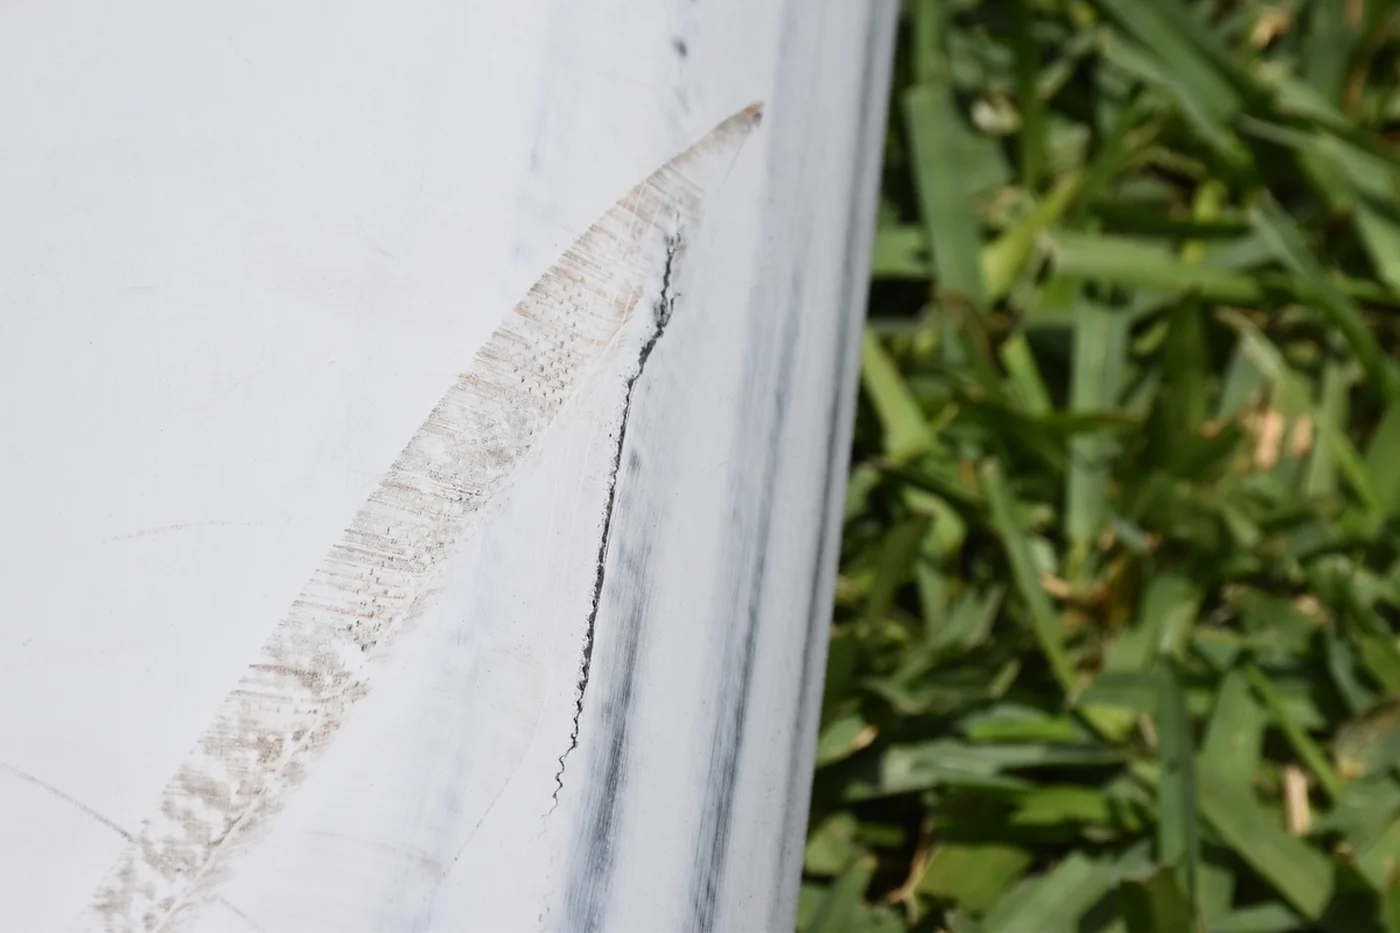
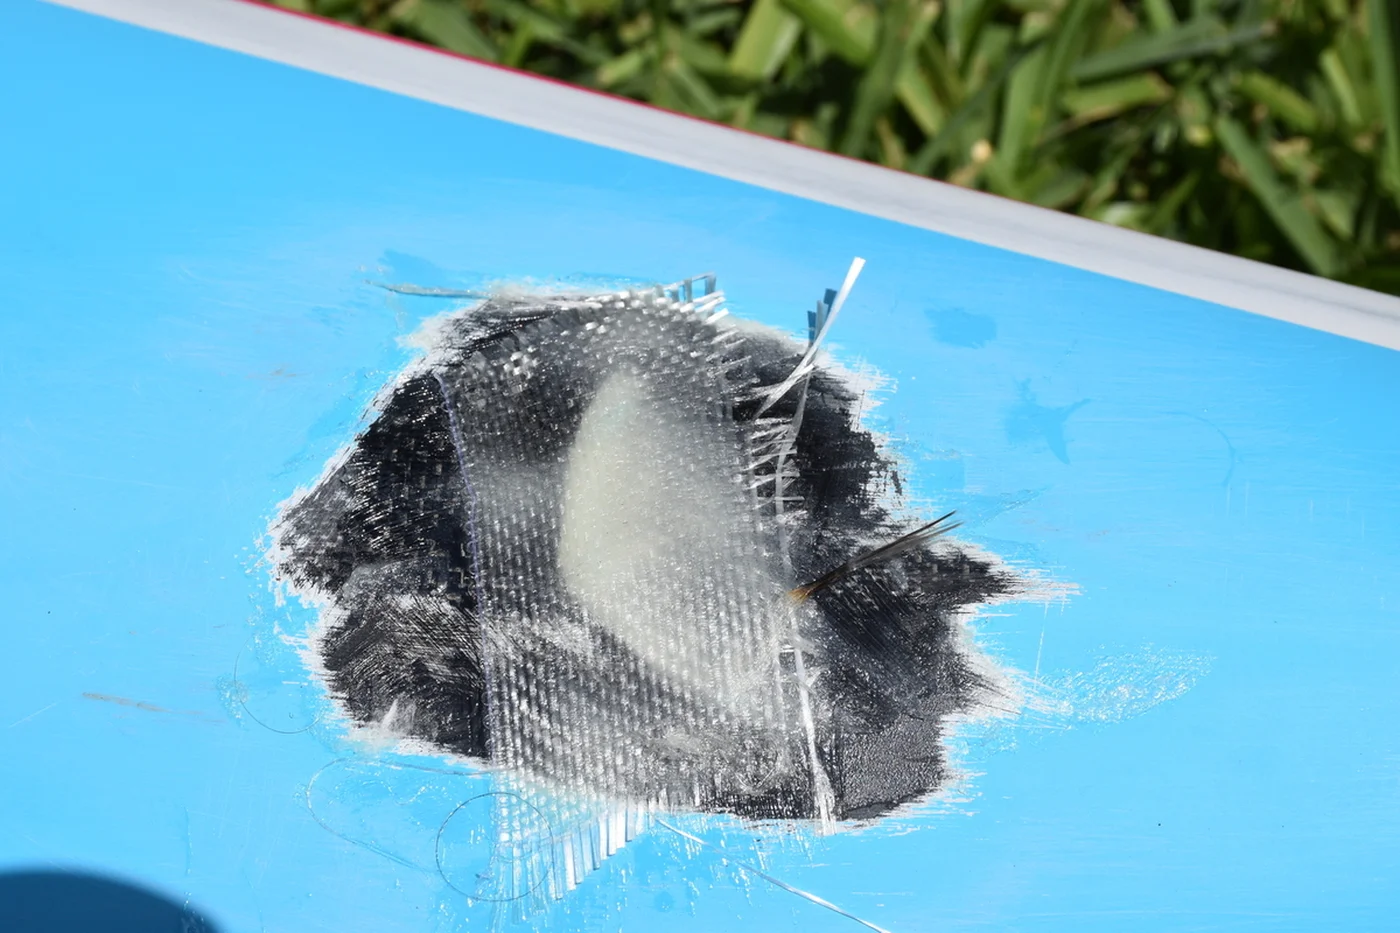
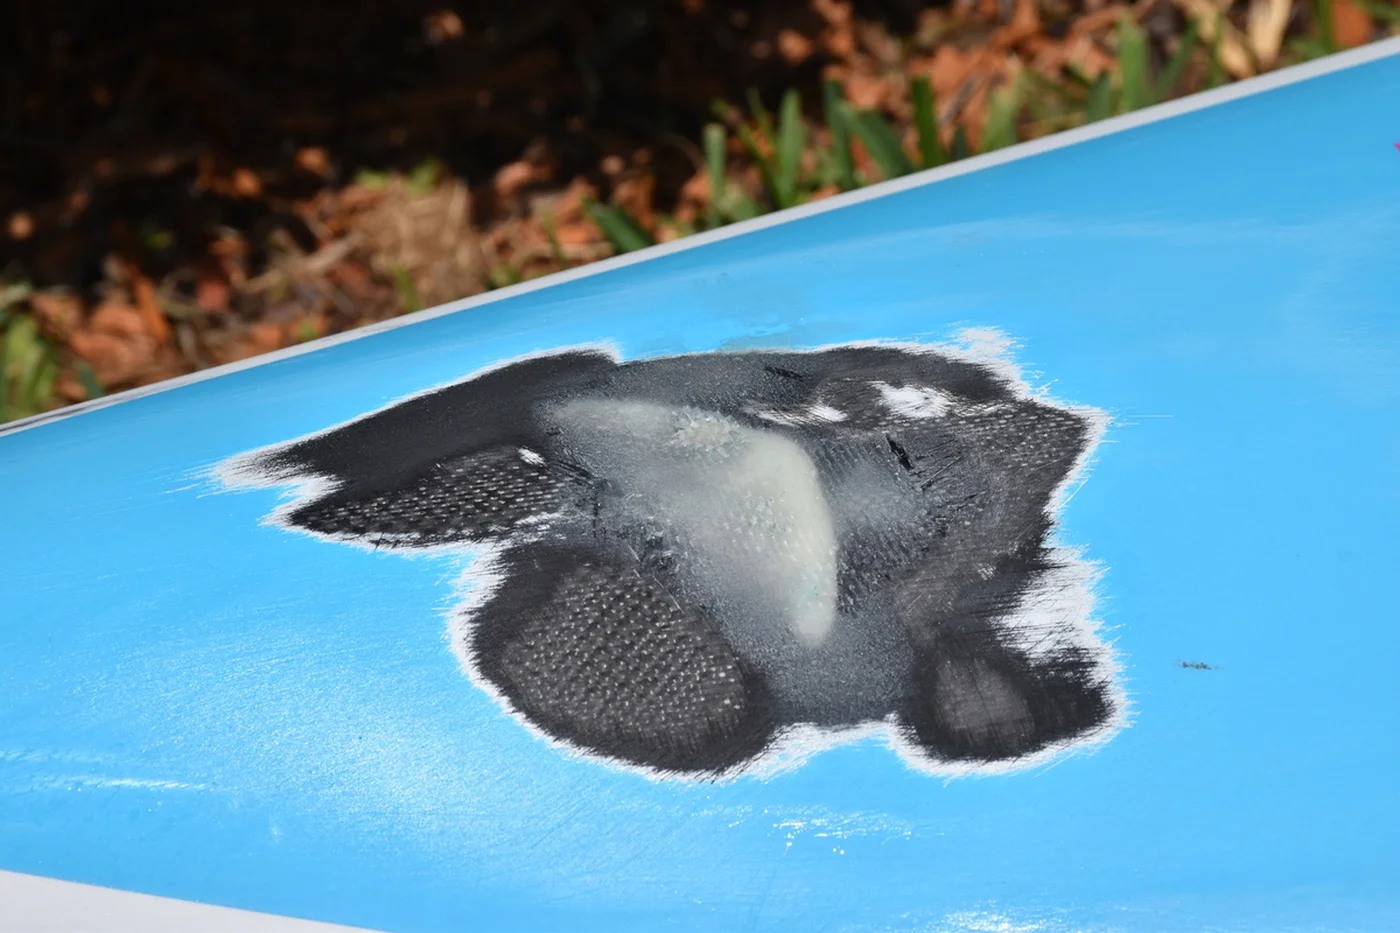
Each crack required a slightly different approach. The top crack received fiberglass cloth reinforcement; the side crack required epoxy and filler to address micro-voids.
Phase 1
Sand the damaged areas using 80 and 120 grit. Avoid removing too much carbon material.
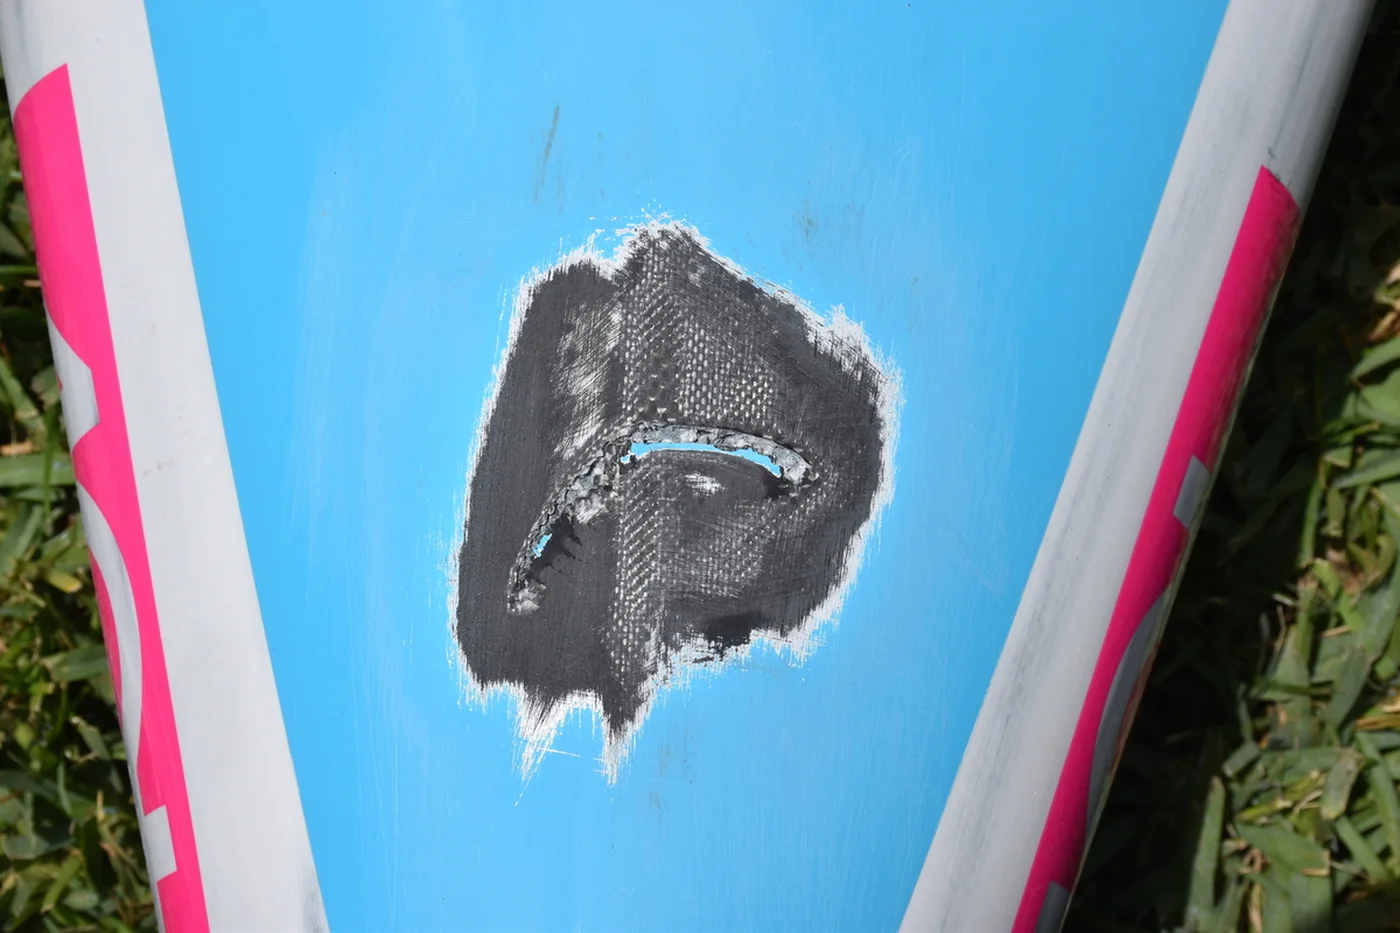
Apply a base layer of epoxy, then mix epoxy with high-density filler. Embed fiberglass cloth for strength.
Phase 2
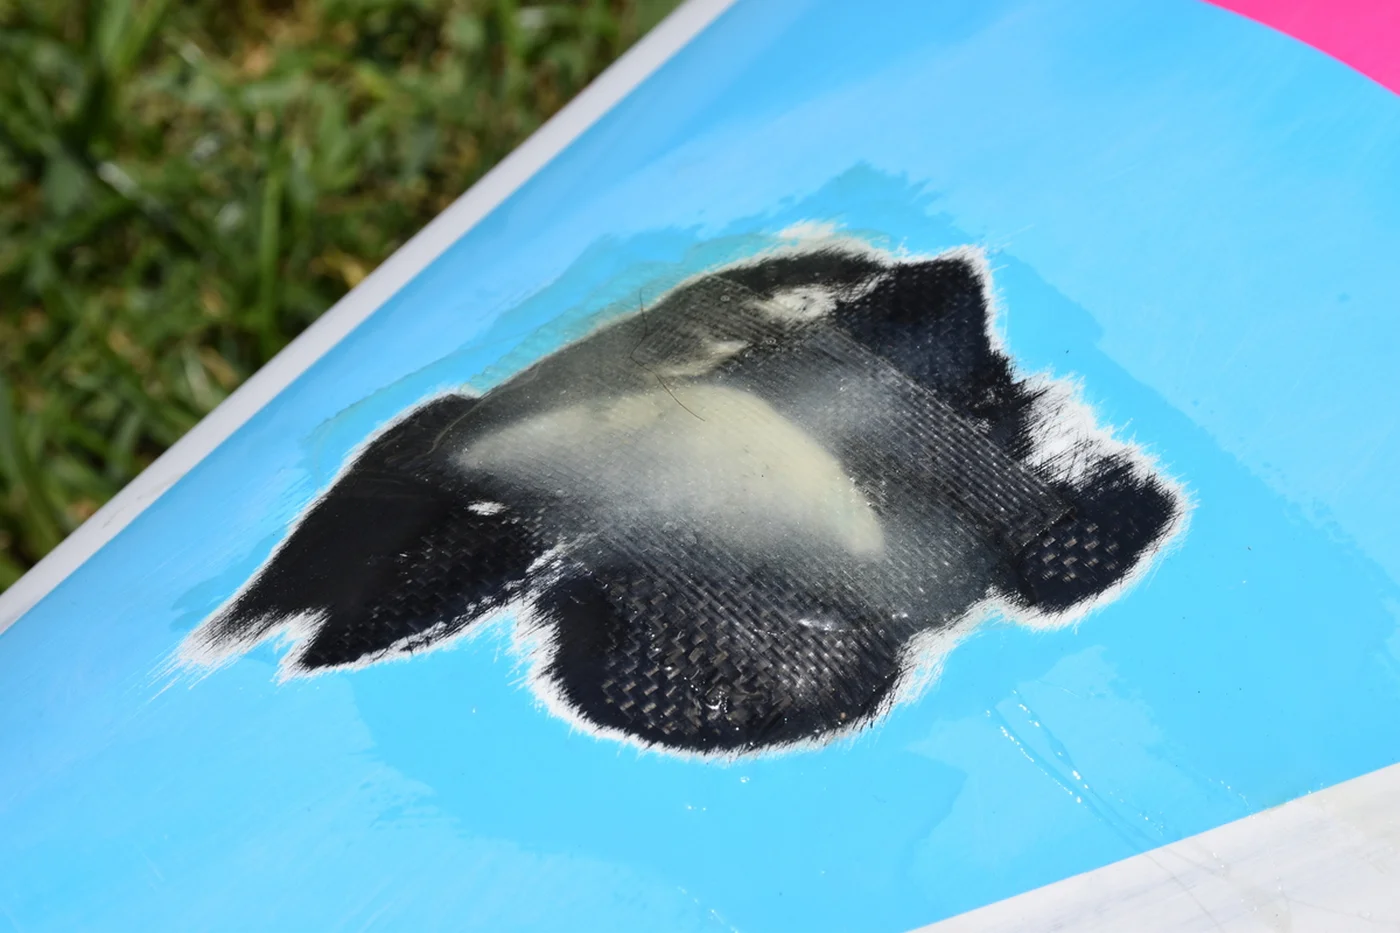
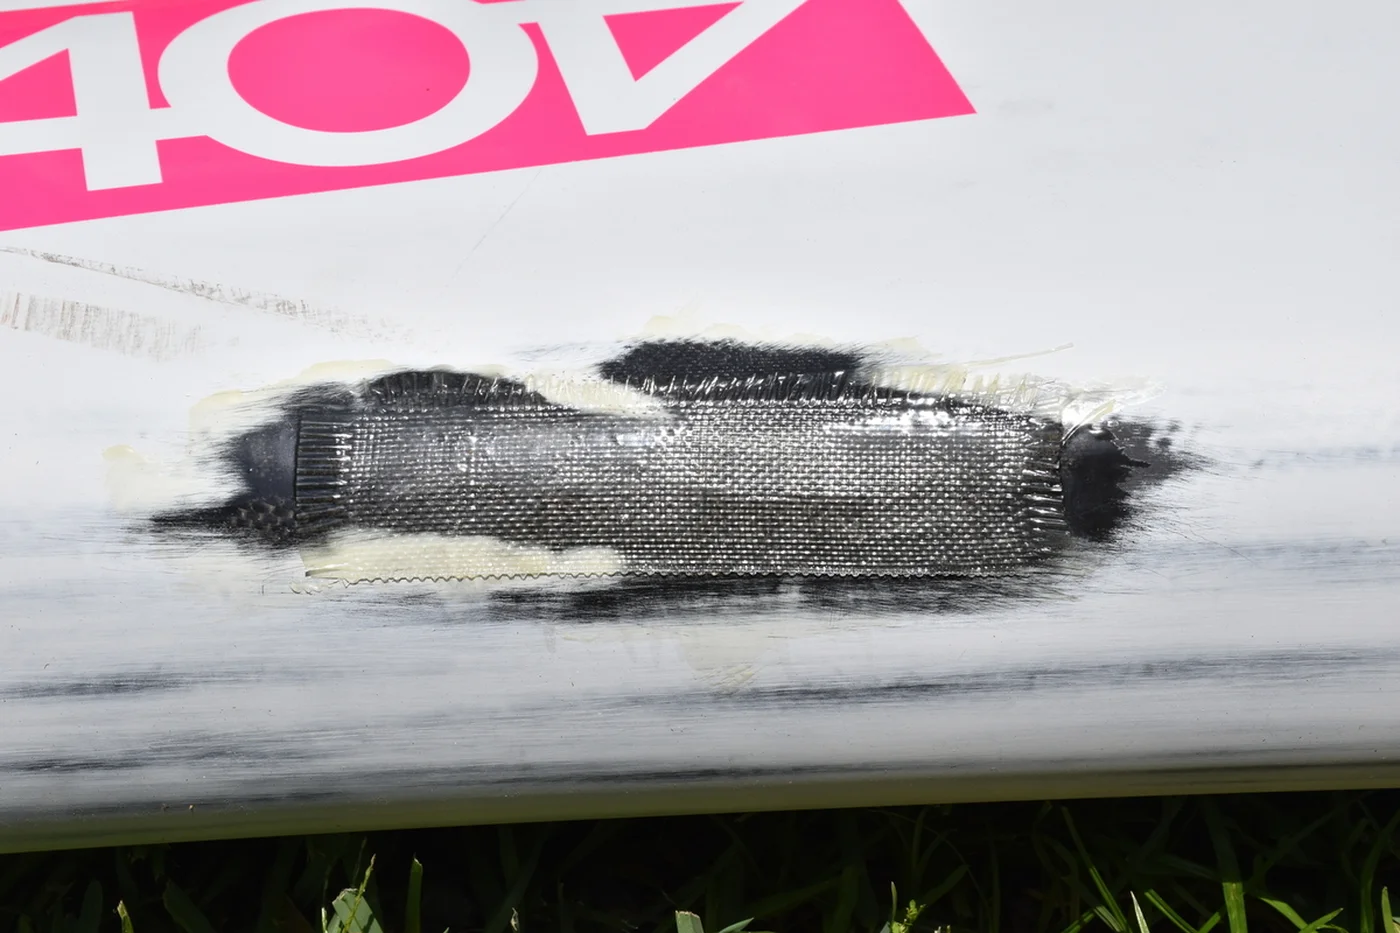
Trim excess fiberglass and sand again with 80 and 120 grit.
Apply another fiberglass cloth layer extending beyond the crack boundaries.
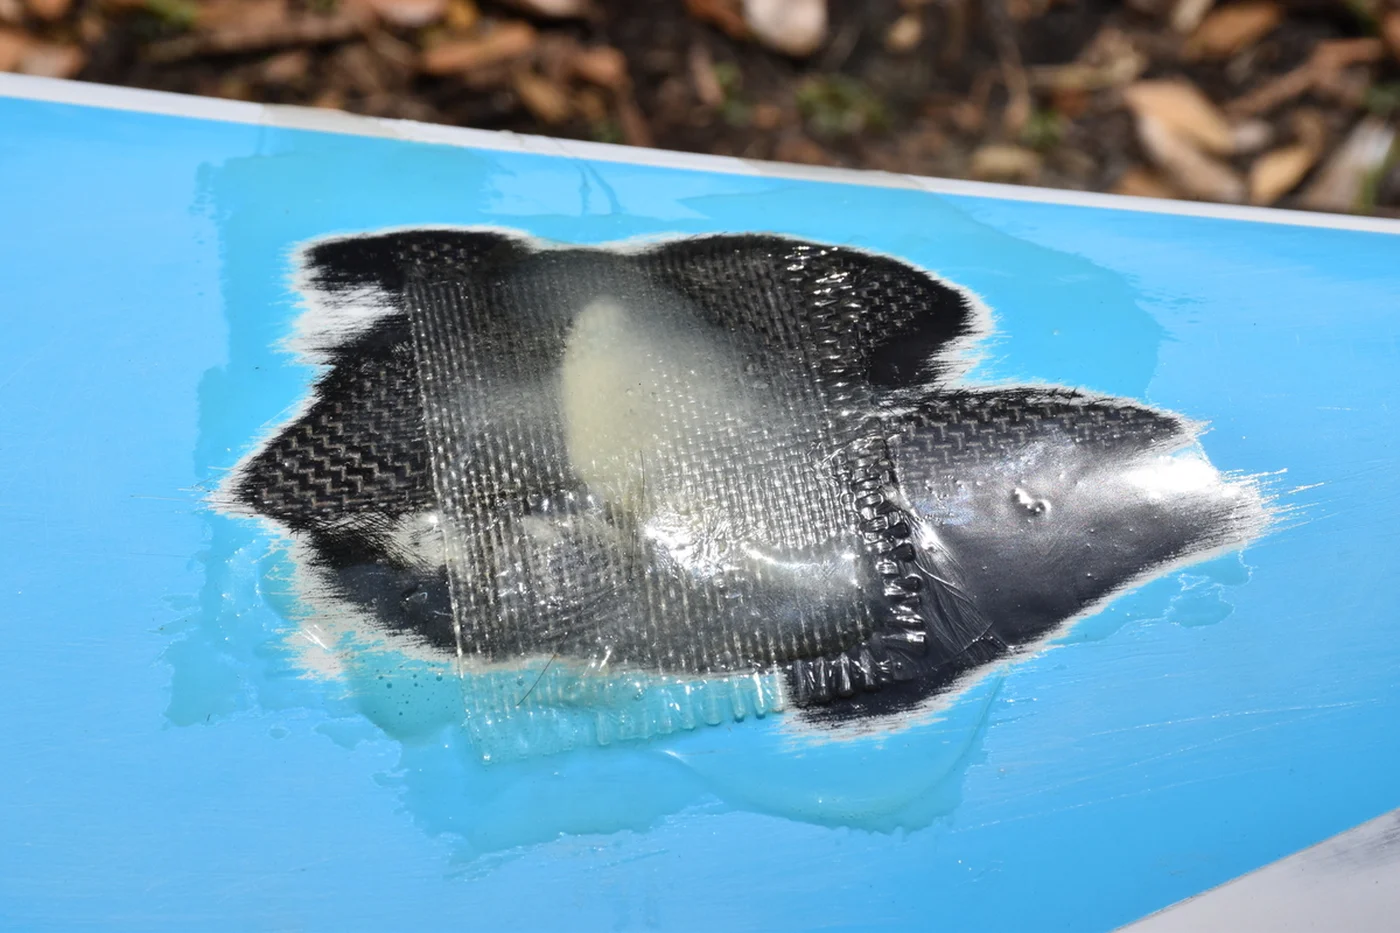
Repeat the process for the side crack.
Phase 3
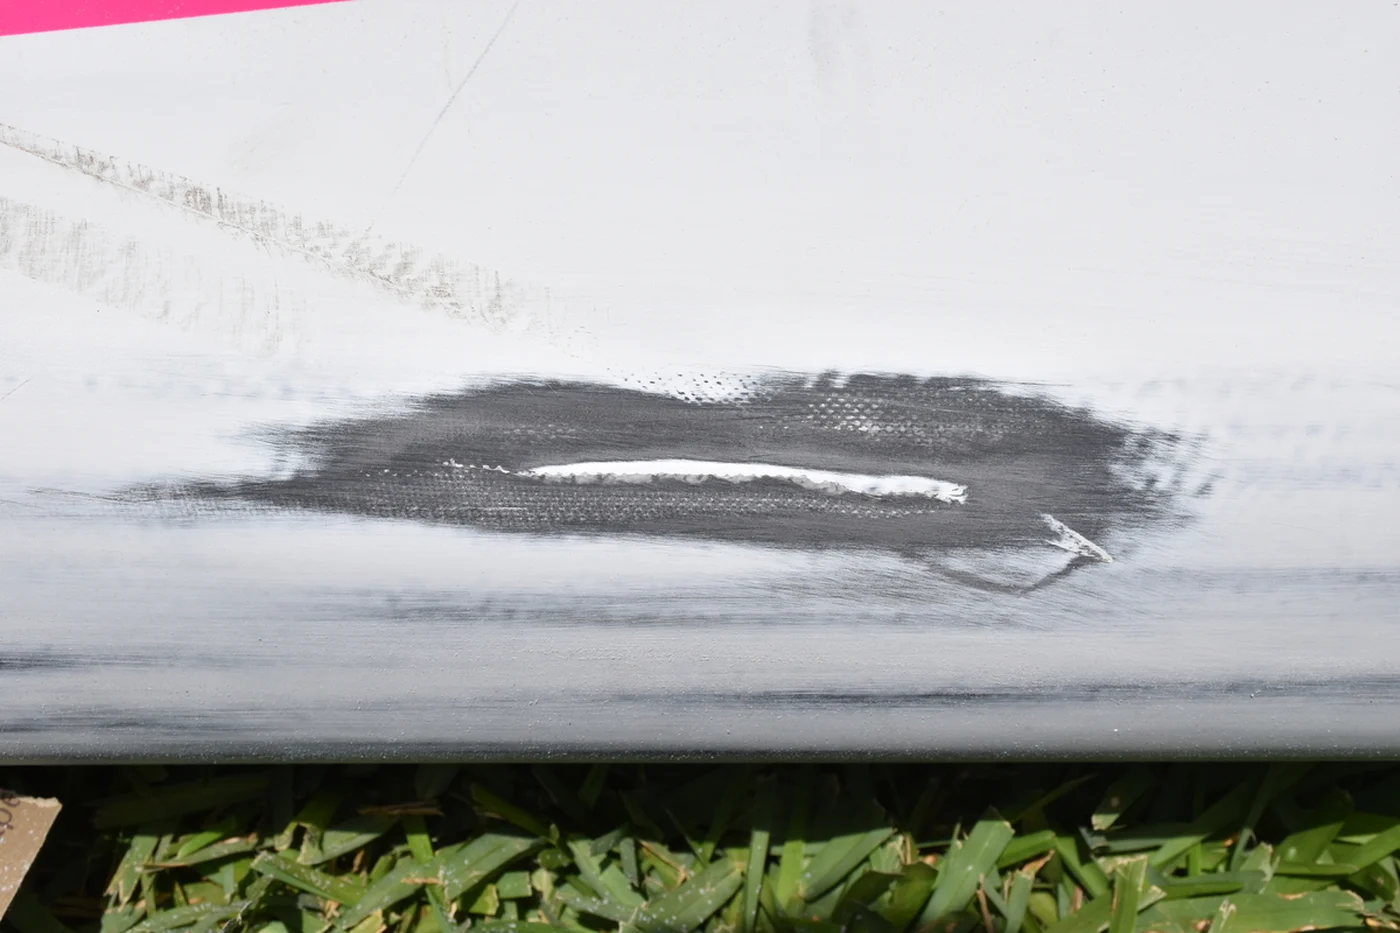
Sand again using 80 and 120 grit, ensuring no hump forms.
Apply a thin epoxy coat to smooth the surface.
Phase 4
Final sanding using 120, 220, and 1200 grit. Wet sanding helps achieve a smooth finish.
Conclusion
The repairs went well and should be watertight. Before painting (covered in part two), I’ll pressure‑test the board for leaks. If you ever damage your board, I hope this helps you DIY the repair.
For more detail, this video shows a carbon surfboard repair after being run over by a car: Watch the video.